
Back to School Shortbread Cookie Sticks

Back to School Shortbread Cookie Sticks
Ingredients
10 tbsp unsalted butter, room temperature
1/2 cup confectioners' sugar
1/2 teaspoon vanilla extract
1 1/2 cups all-purpose flour (180g)
1/2 tsp kosher salt
6oz white chocolate (eraser tip)
Light pink food coloring/gel
6oz milk chocolate chips
Directions
In a stand mixer fitted with a paddle attachment, beat butter and vanilla extract until creamed.
Add confectioners sugar and salt and mix until combined.
Scrape your bowl down and add flour while beating on low. Scrape bowl once more and mix until combined.
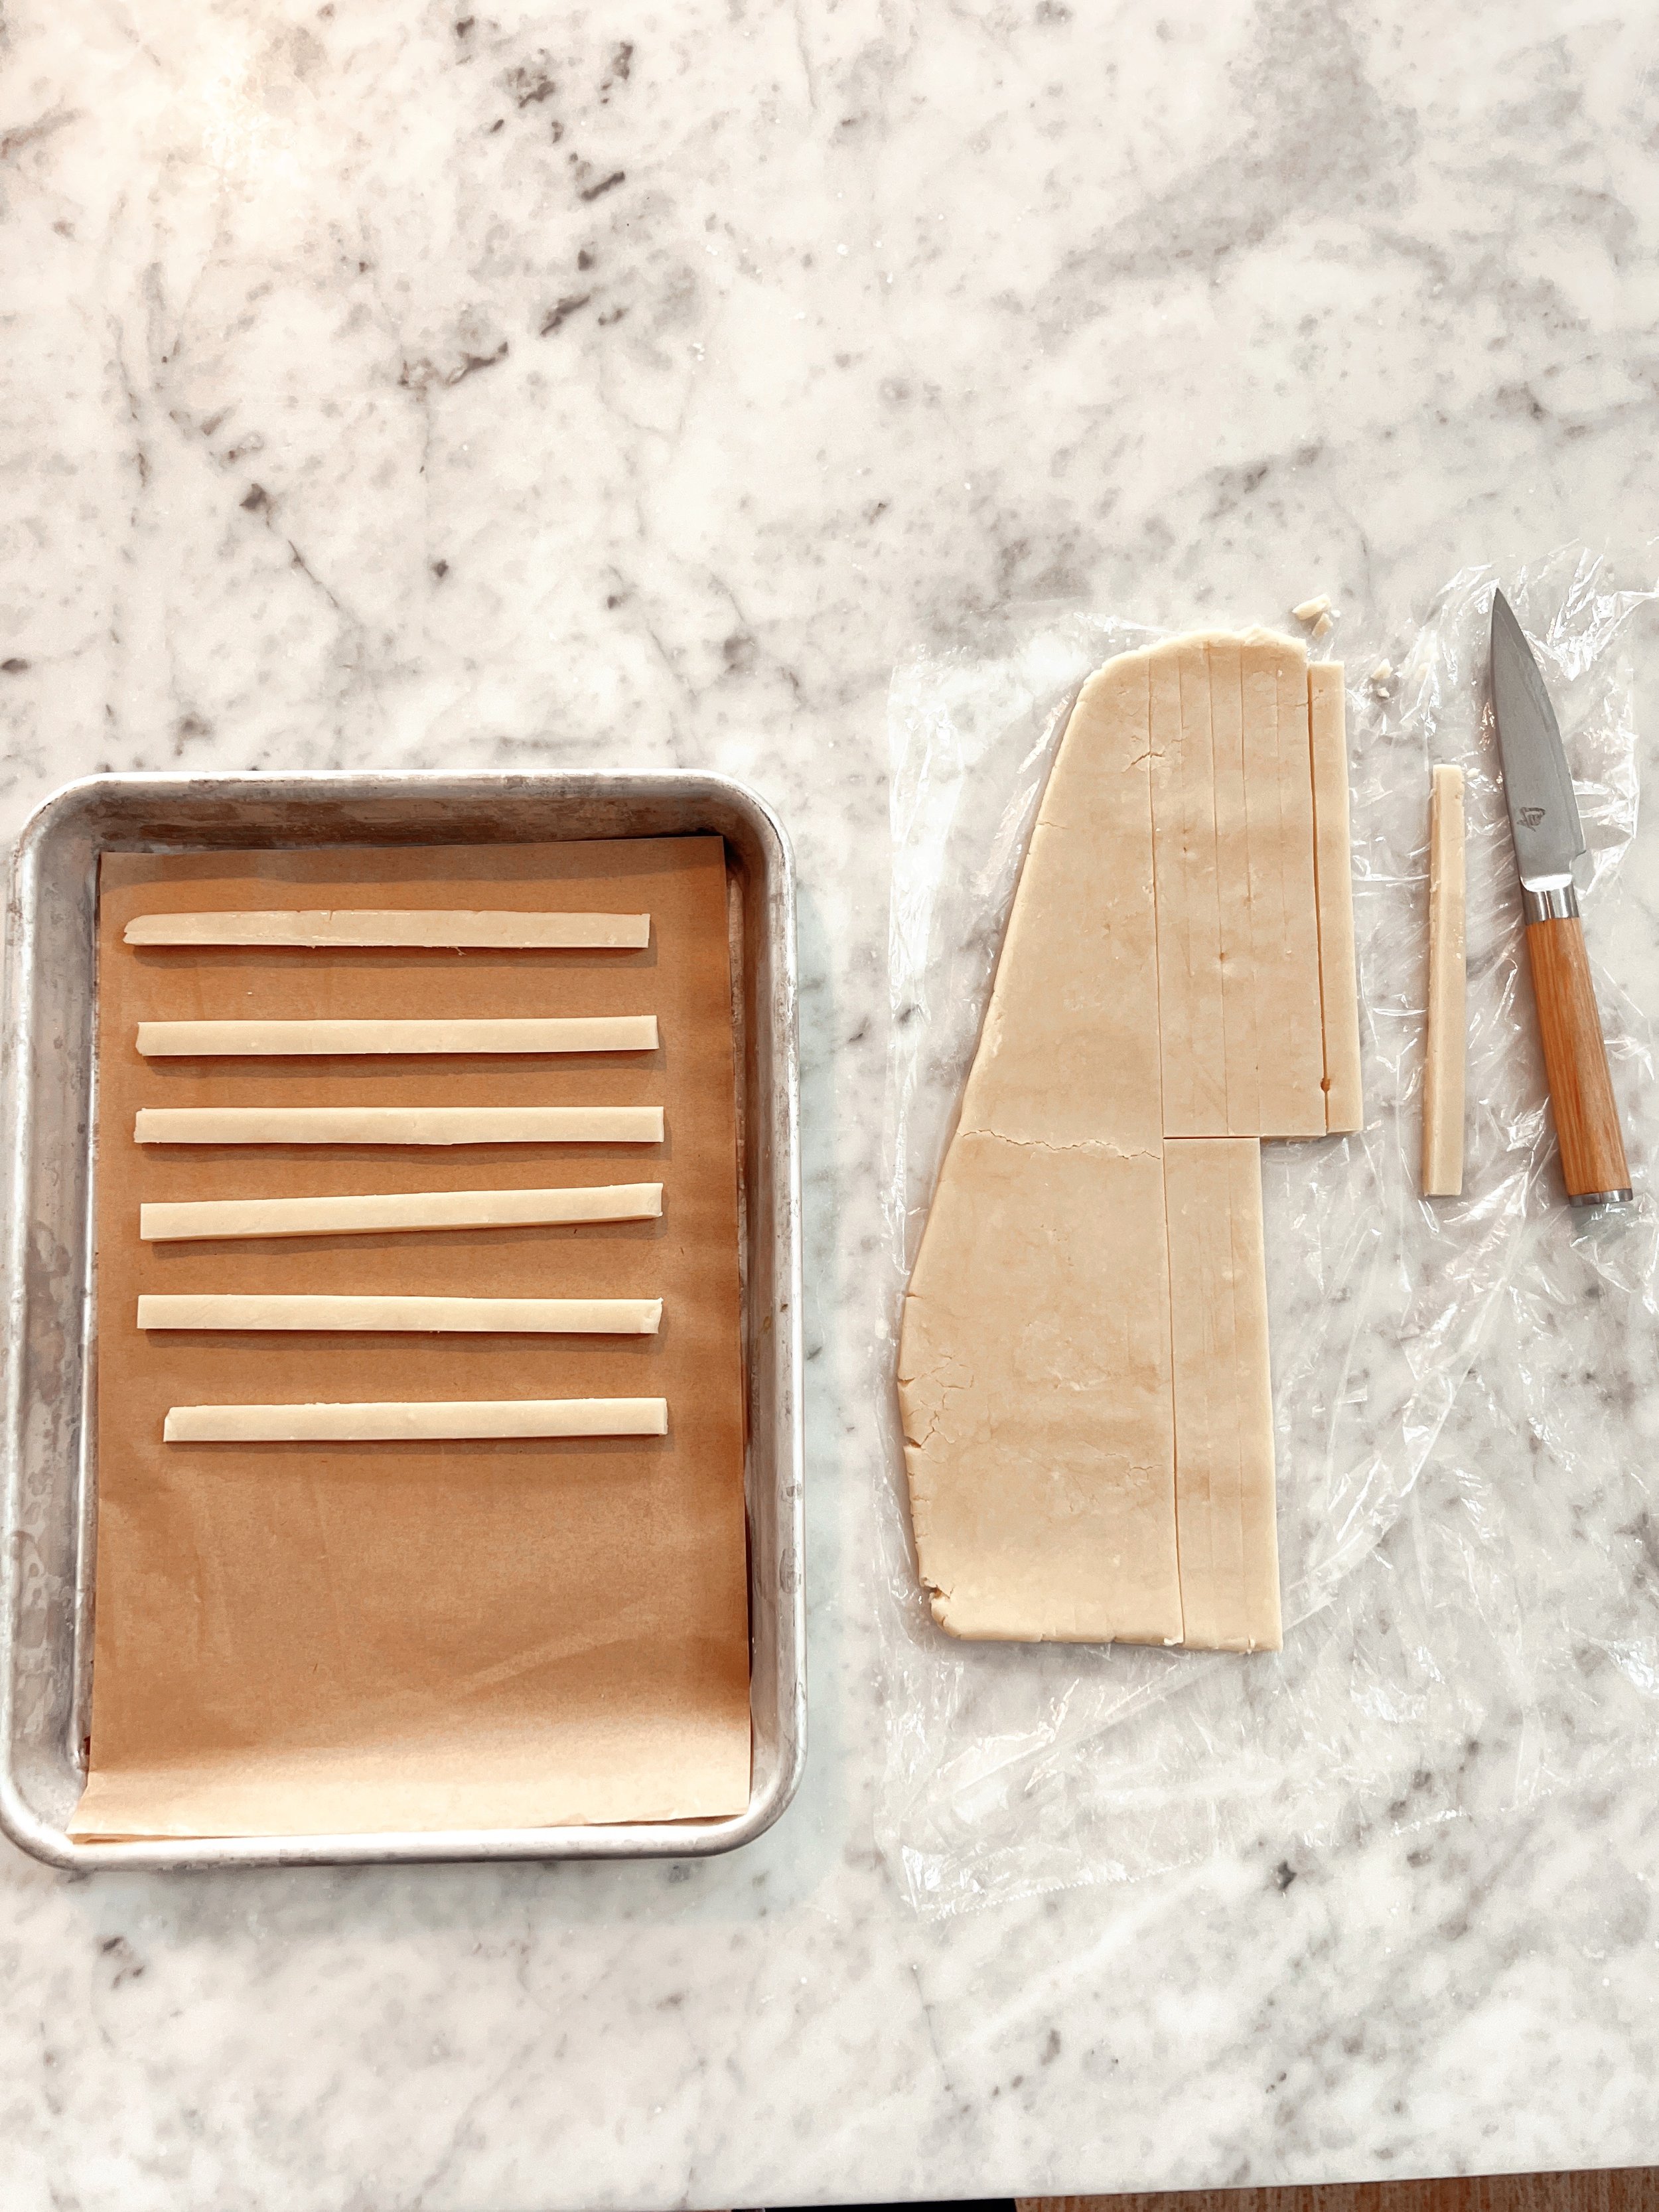
Shape the dough into a large flat rectangular piece, about 1/2” thick and wrap in plastic. Chill until firm for about one hour.
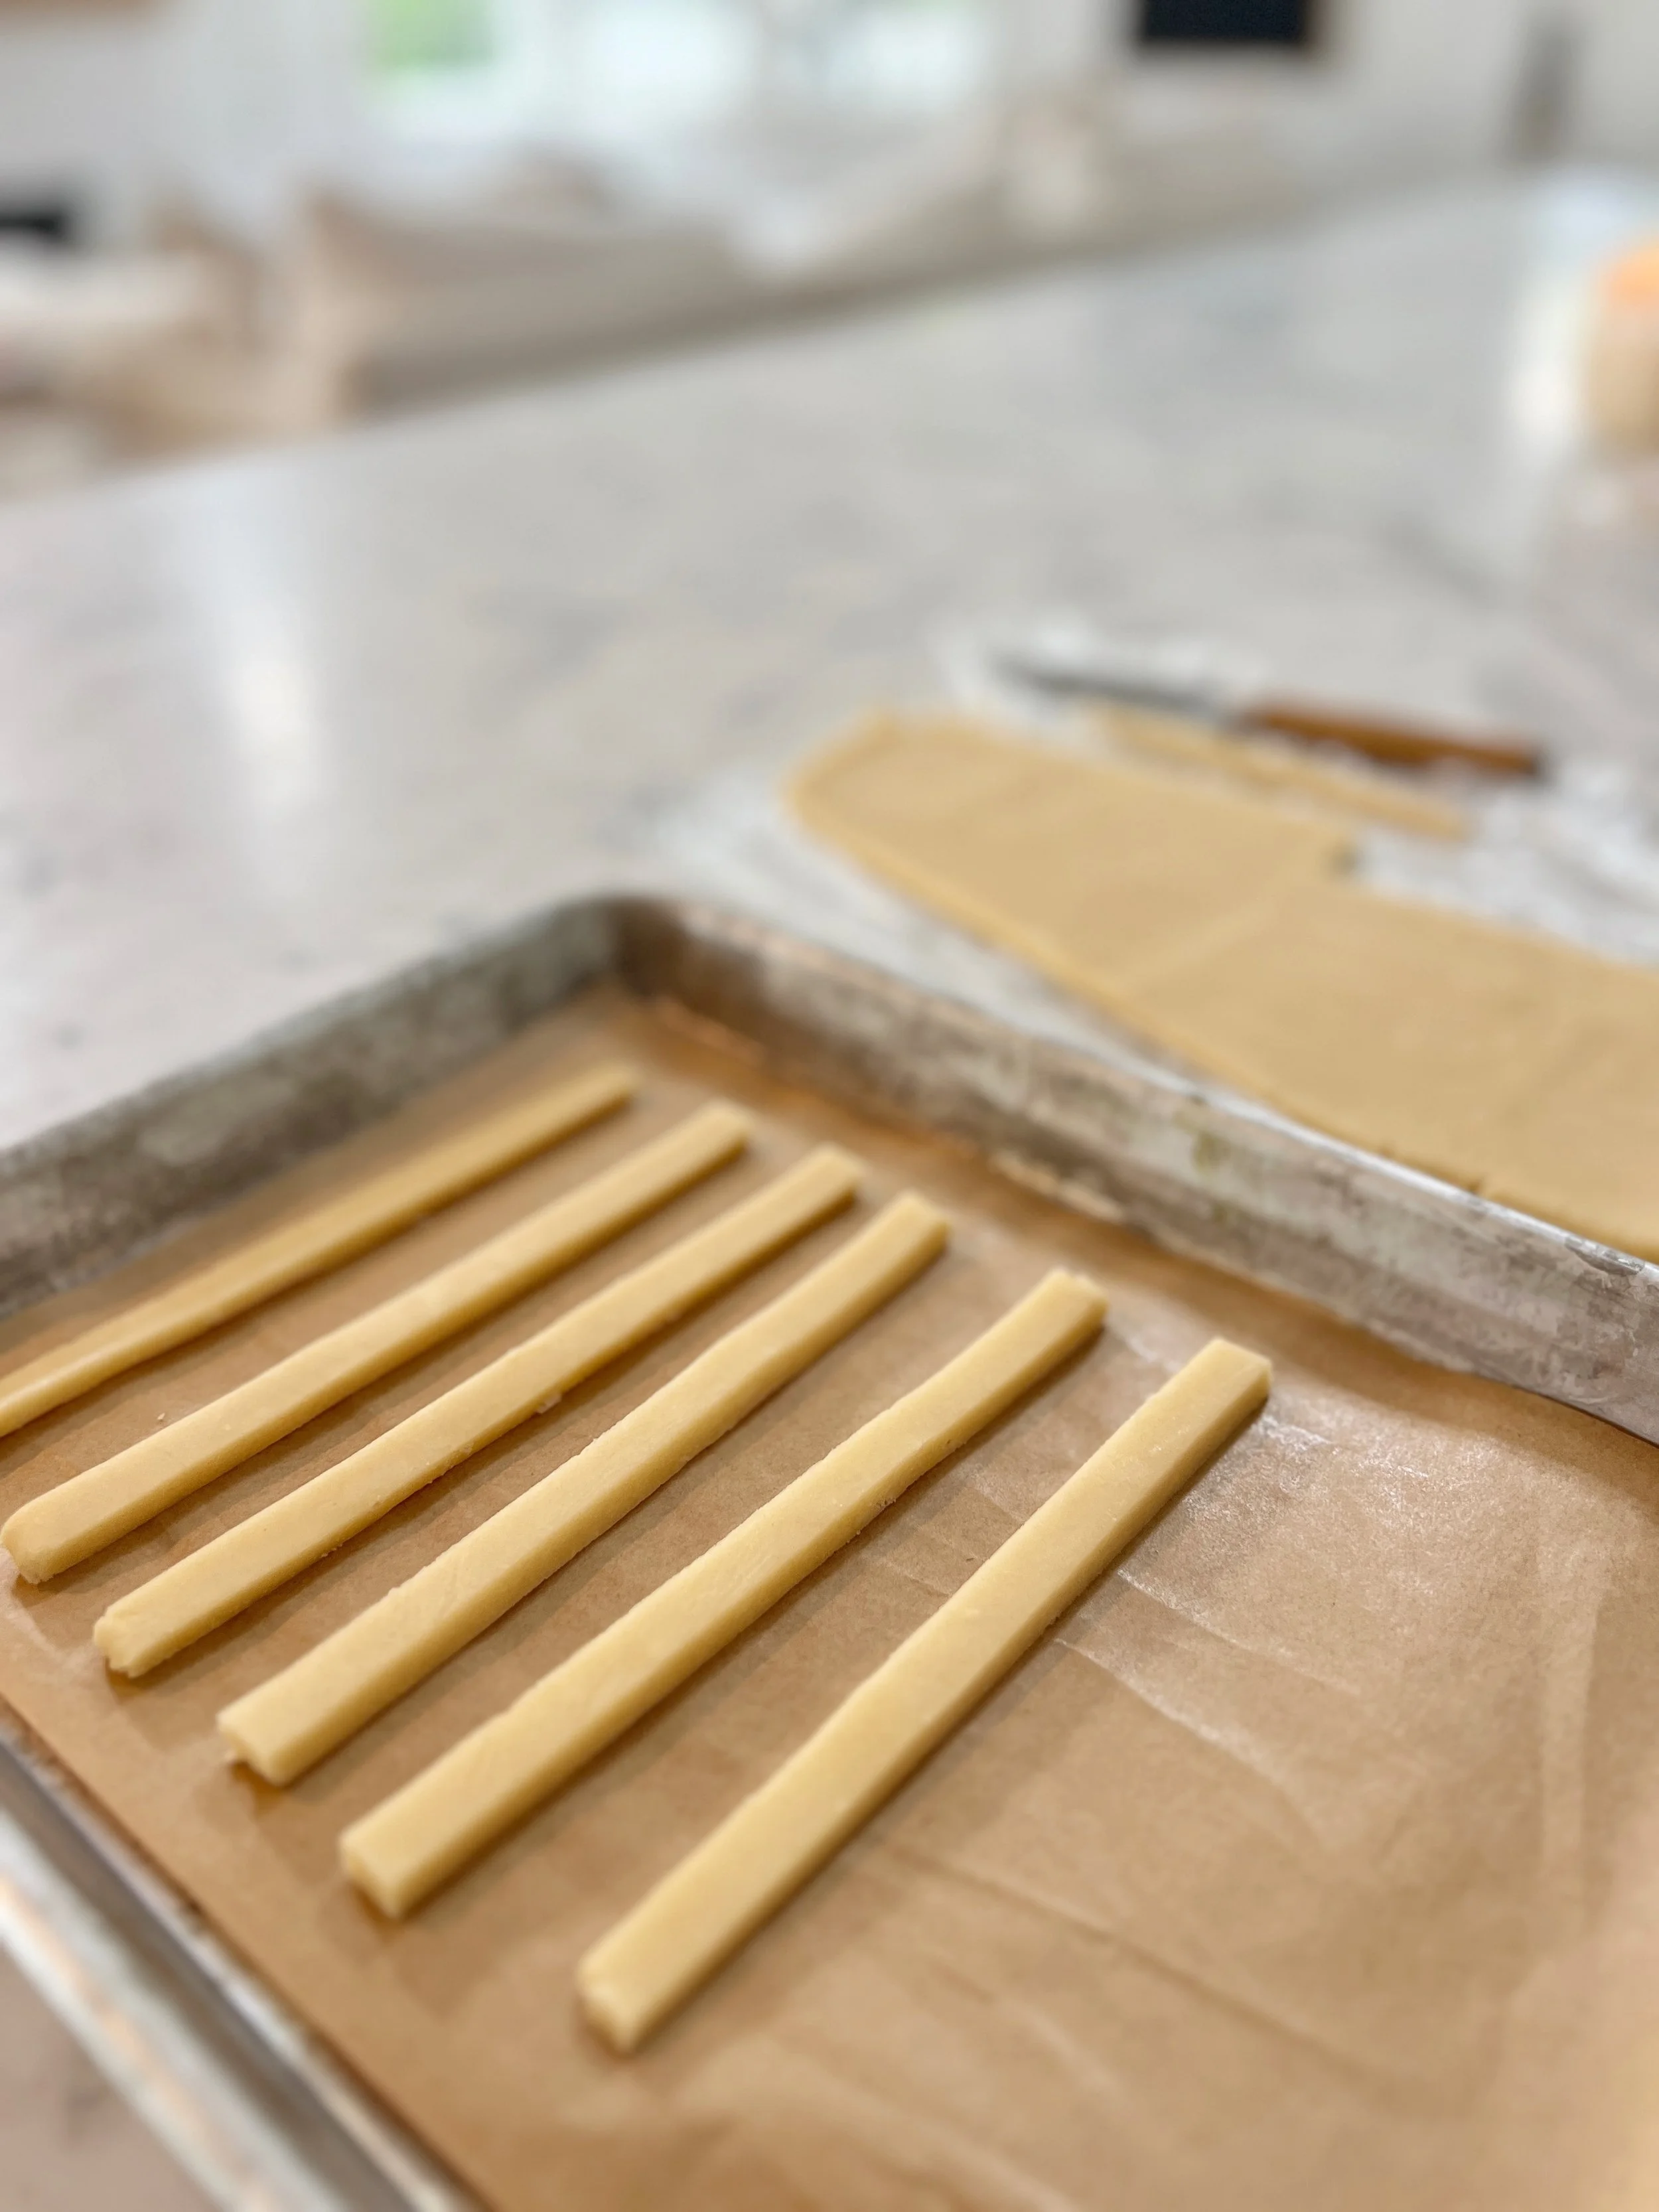
Preheat oven to 350F (177C). Using a sharp pairing knife, cut 1/2 inch thick 8” long slices of dough and cut one end at an angle until the dough to resembles a pencil.
Place your dough slices about an inch apart on a baking sheet lined with parchment paper. Place baking sheet into freezer or refrigerator for another 20 minutes. This will ensure the dough is chilled and it will allow it to hold its shape while in the oven.
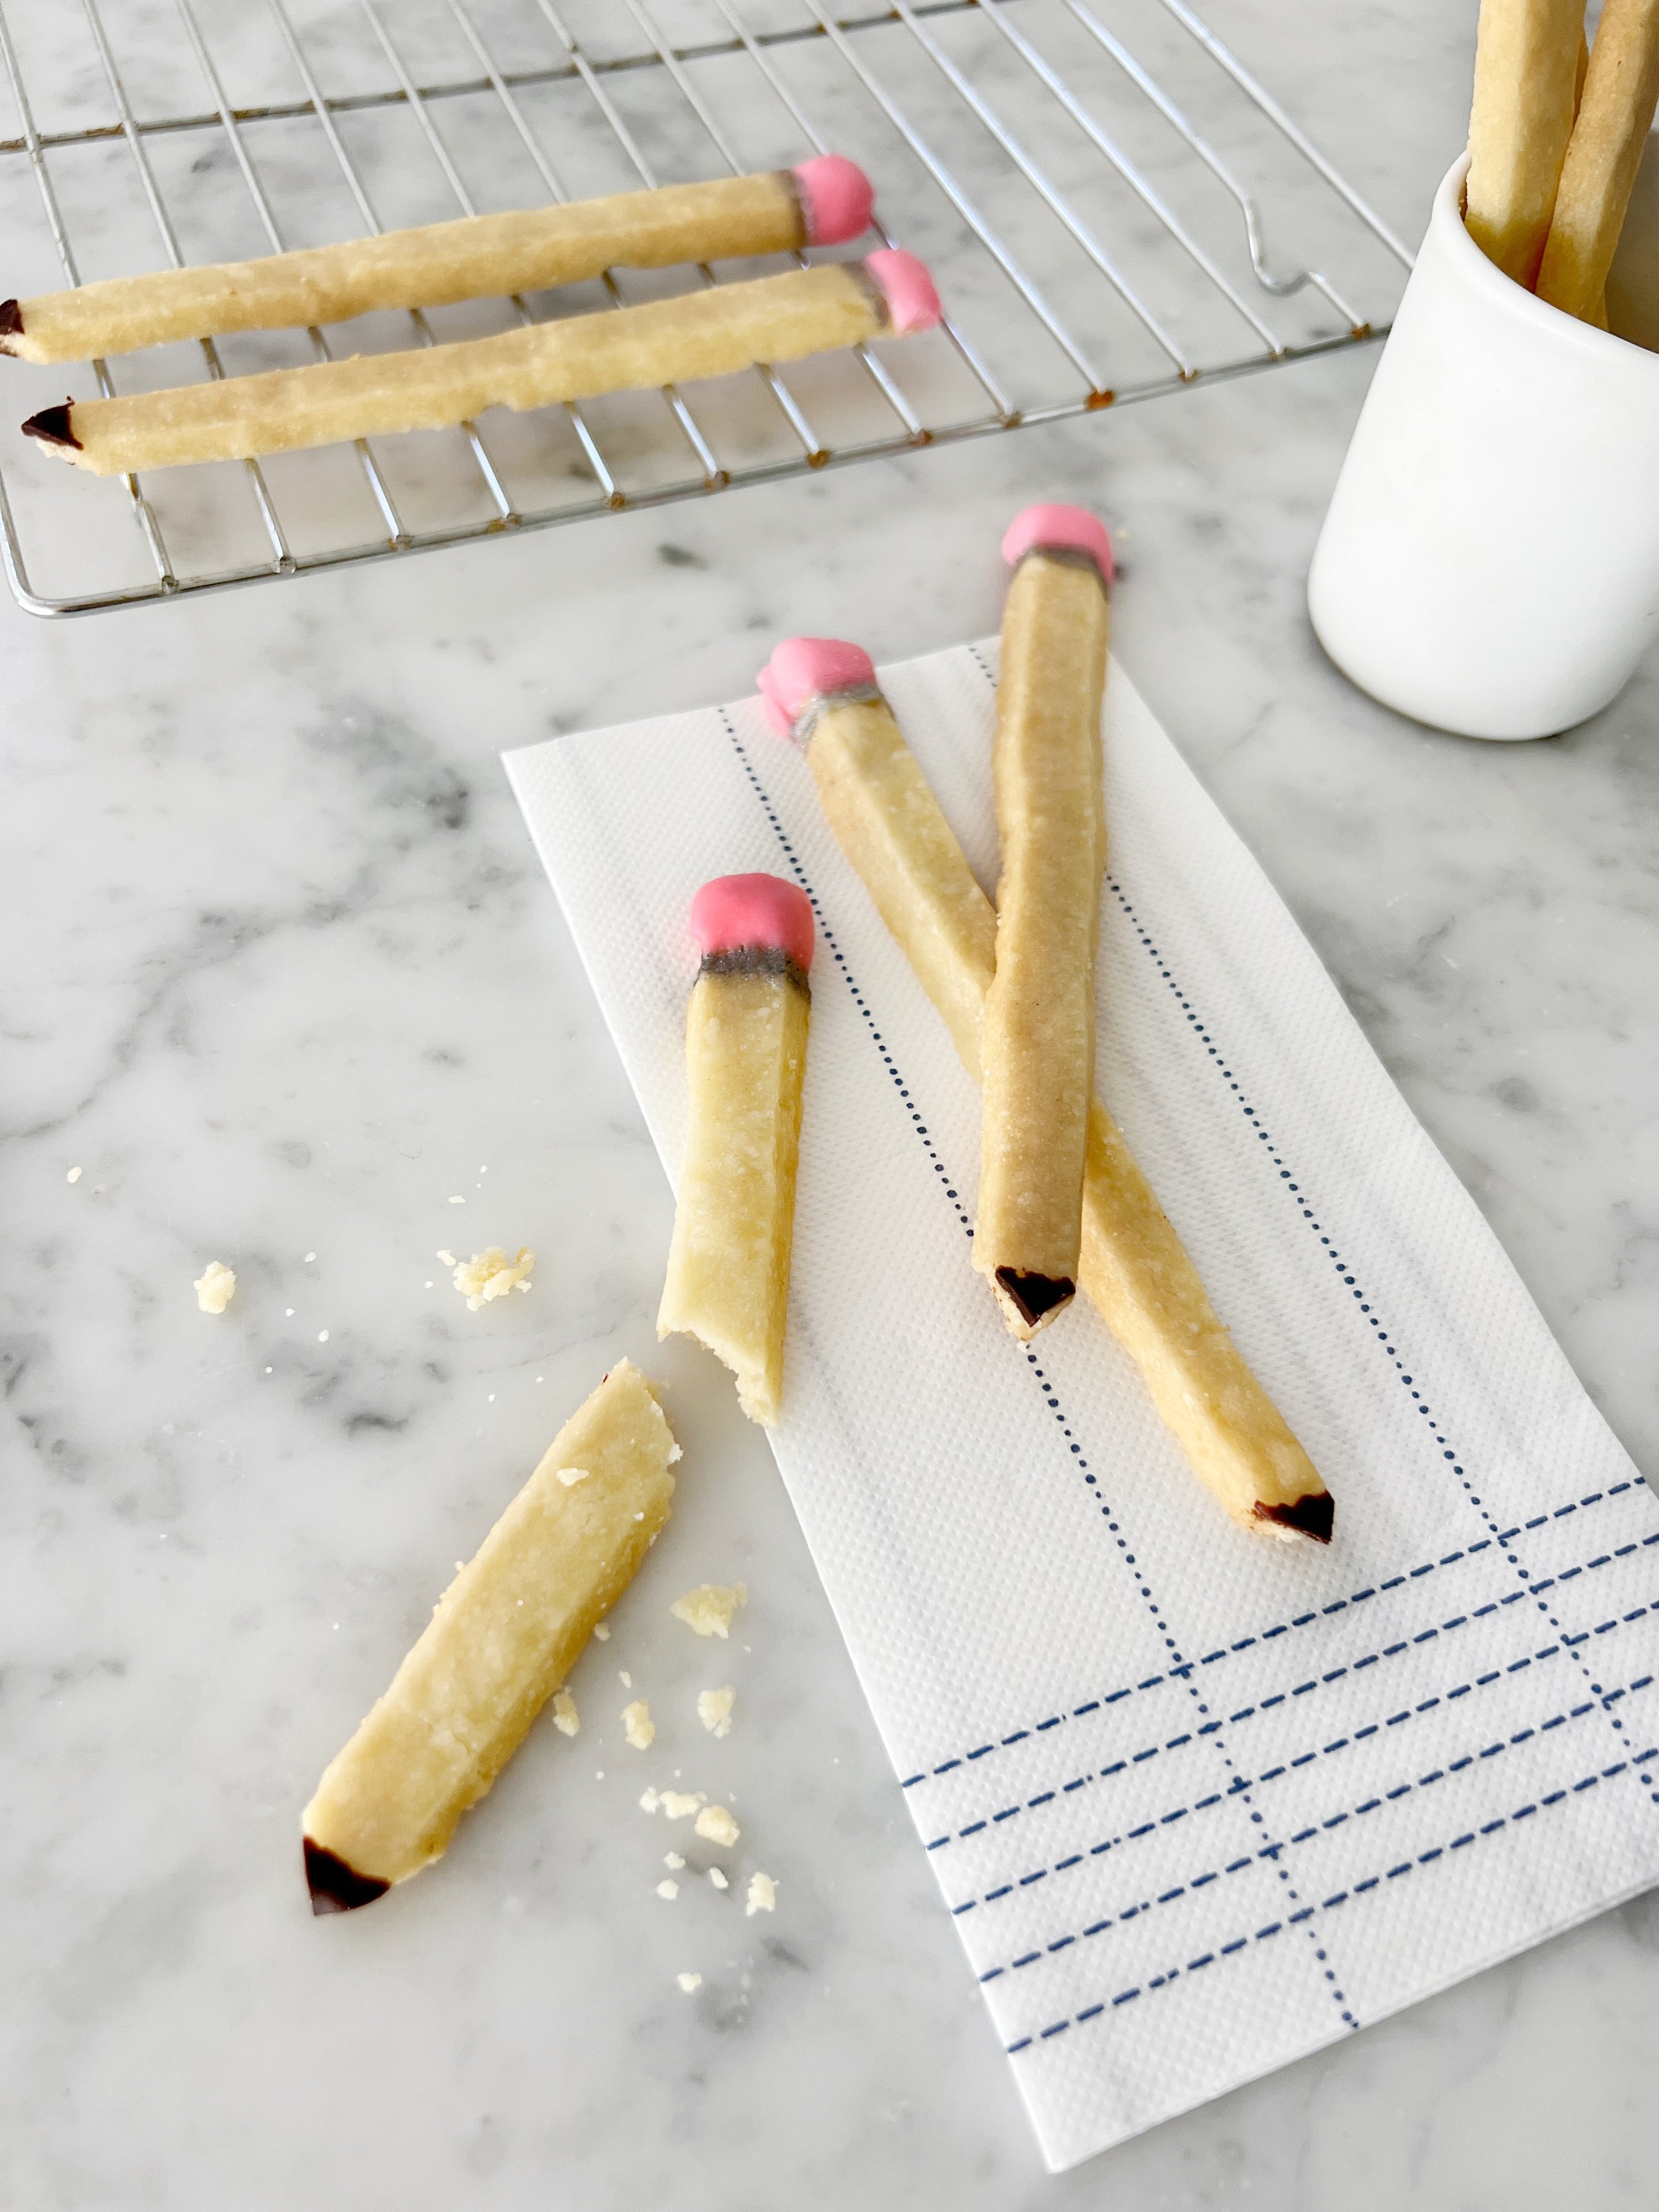
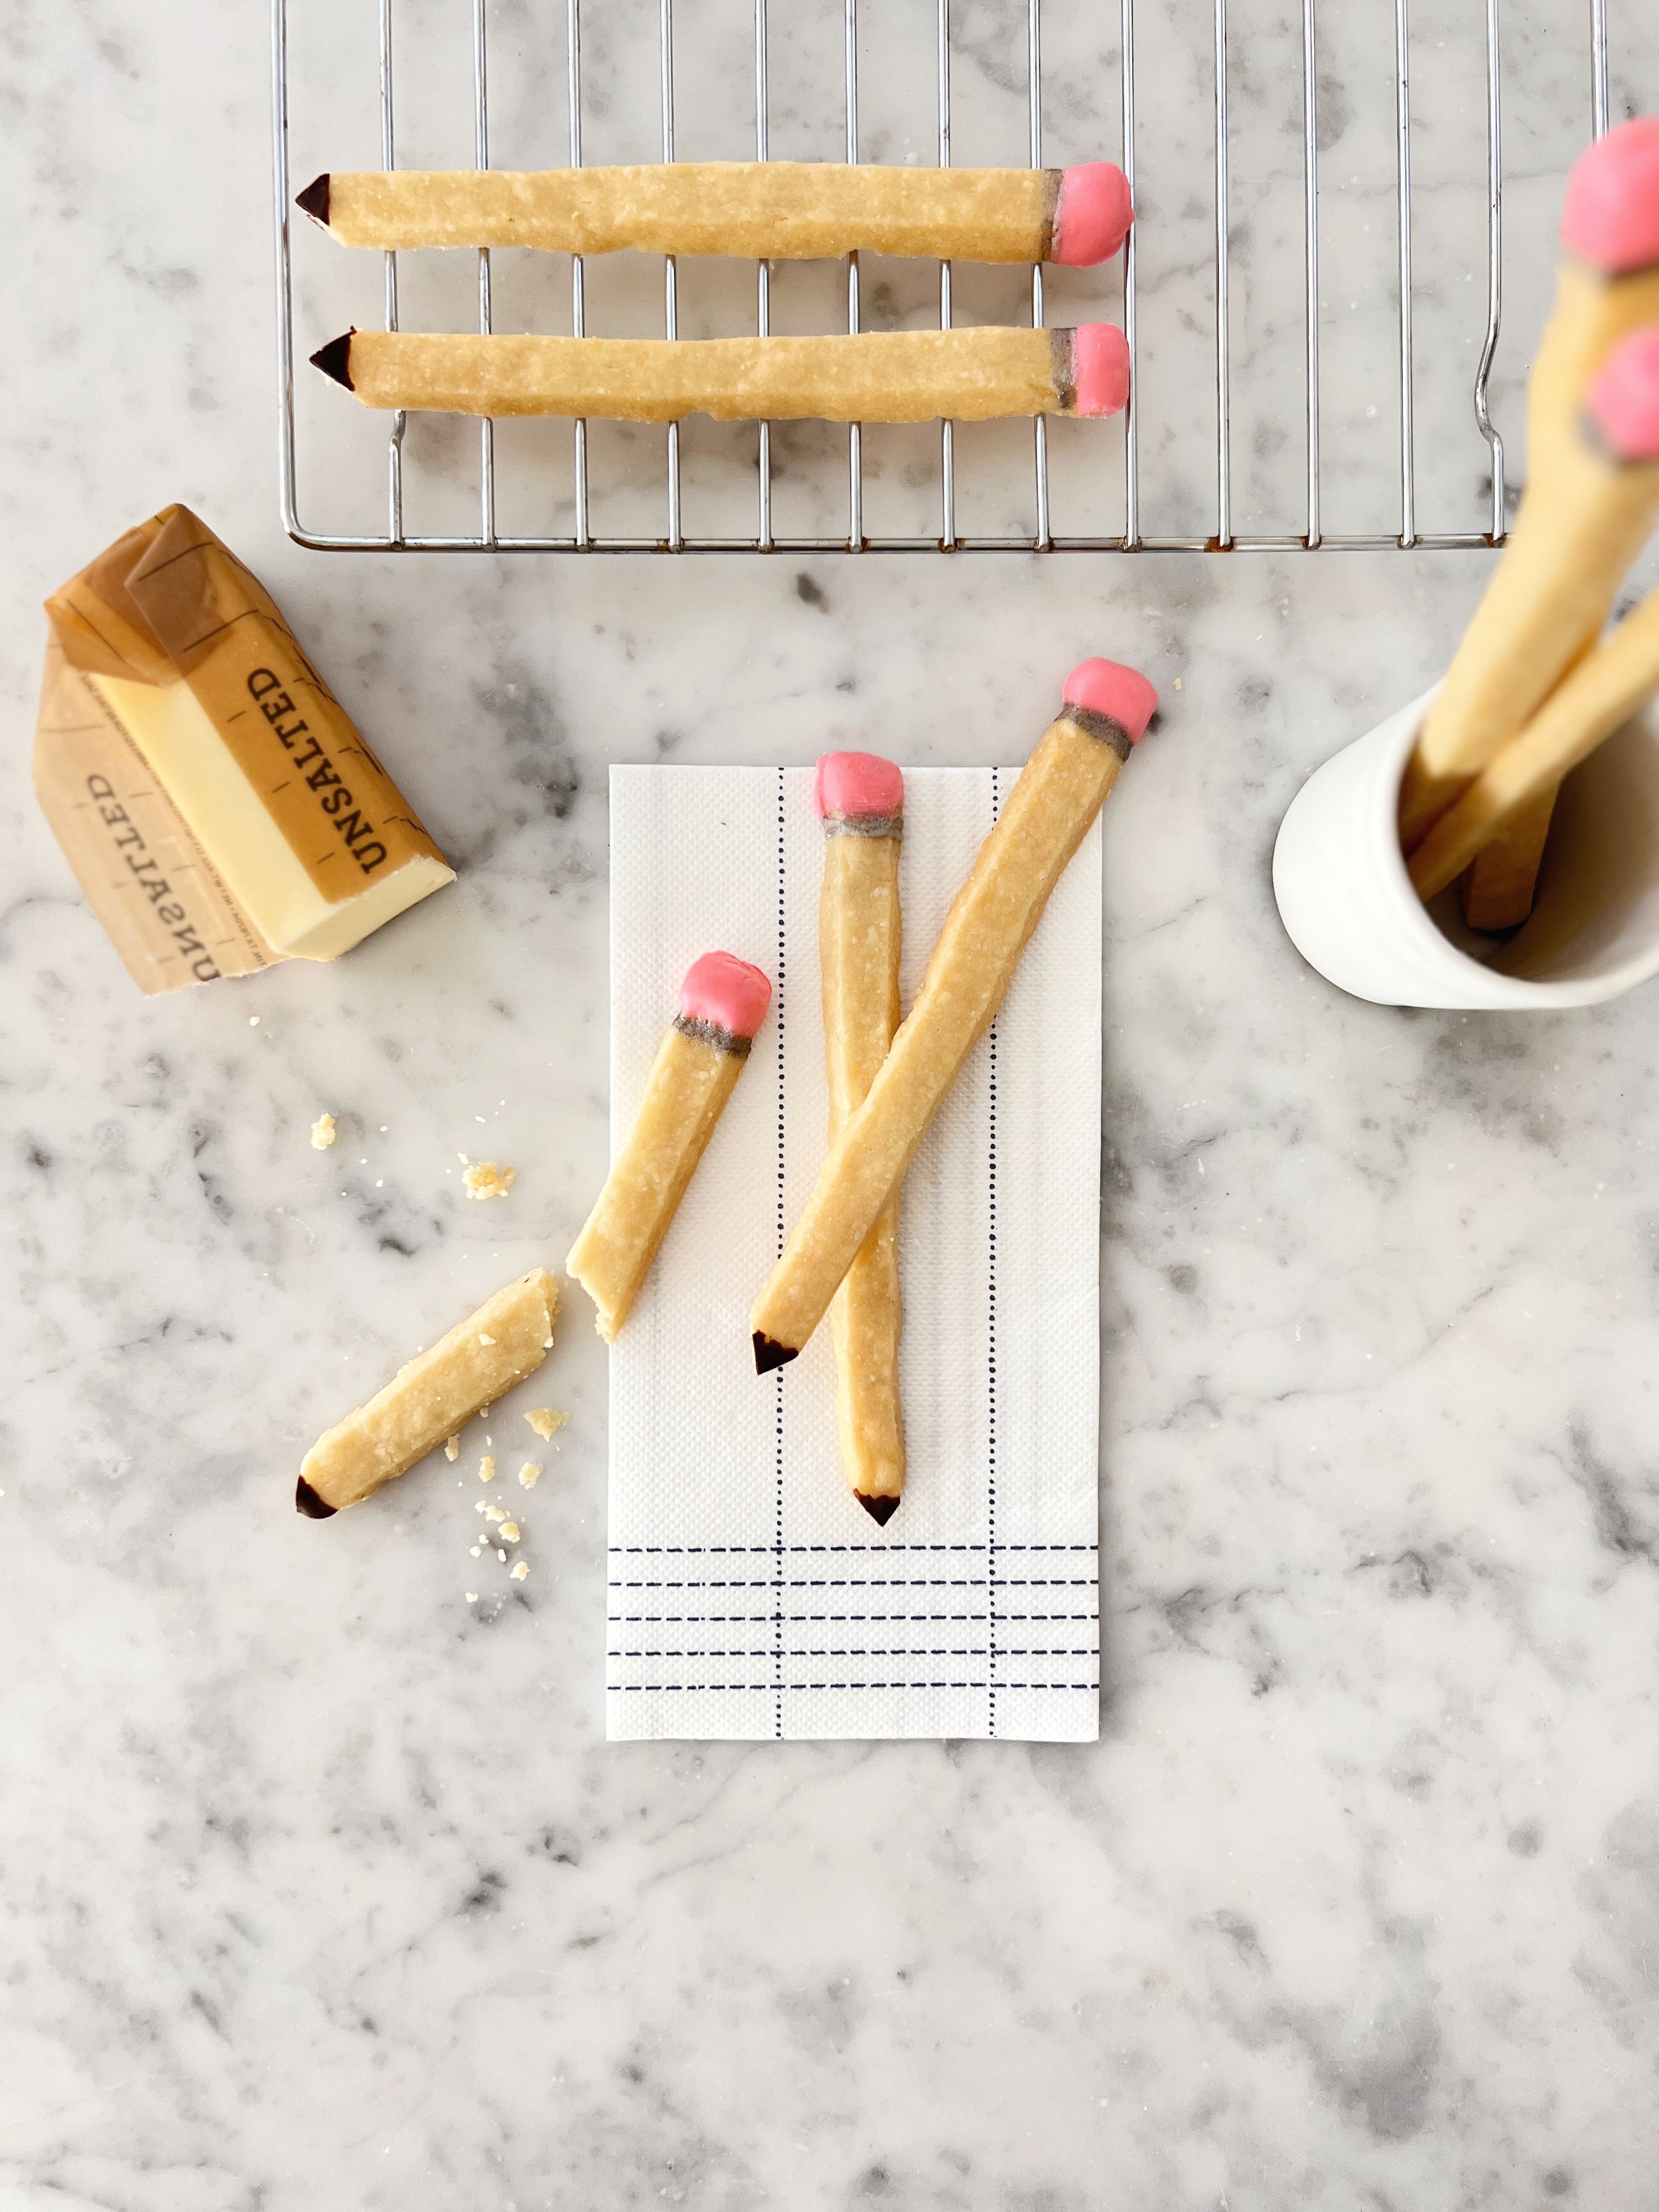
Bake your cookie sticks for 12 minutes, rotating baking sheet in the oven halfway through.
Remove your cookies from the oven. If your cookies spread out a bit you can carefully use two knives and tap the sides of each cookie ever so softly until you have a perfect thin rectangle again. Transfer to a wire sheet to cool.
To make the “eraser” tip I dipped one end of all the cookie sticks into melted white chocolate (I added light pink food coloring gel). I refrigerated the cookie sticks with the “erasers” for twenty minutes then used a fine tip paintbrush and silver finishing powder to brush below the eraser to achieve the “metal” look. I melted a small amount of dark chocolate and dipped the sharp side of the cookie stick into the chocolate to achieve the “pencil led”.